What you can expect from a solar panel installation
Solar panel installations typically take about a day to complete, depending on the complexity of the system.
Solar panel installations require scaffolding, fixing brackets, wiring, inverter & interconnection to the grid.
Solar panel installations need to be done by MCS Certified installers, who will also handle the documentation.
Solar panels are devices that convert sunlight into electricity. They can help you save money on your energy bills and also help you reduce your carbon footprint and save the environment and the planet. Installing solar panels on your roof is a complex process that involves several steps. Here is a quick overview of what you can expect from a typical solar panel installation.

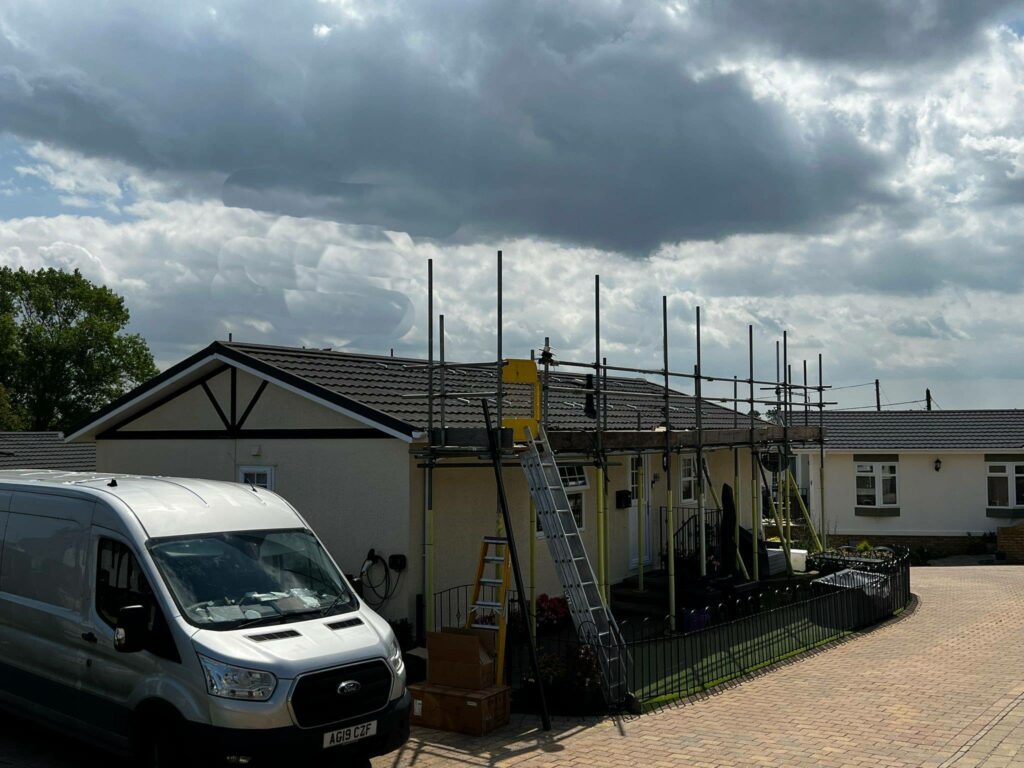
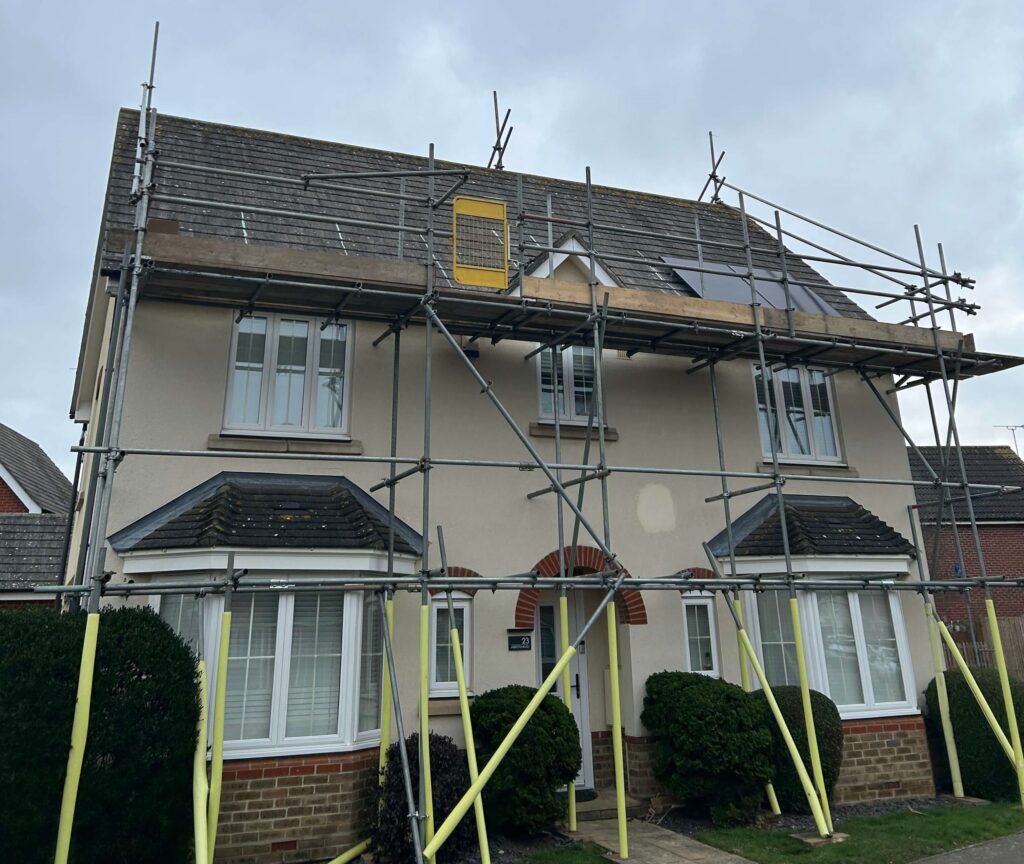
Step 1: Scaffolding
Before the solar panel installation begins, your MCS Certified Solar PV Installer (you did pick an MCS Certified installer didn’t you?) will set up some next generation scaffolding around your roof to ensure safe working conditions and easy access to your roof to safety install your solar panels without damaging your roof or your solar panels. This may take a few hours to a couple of days to erect depending on the size of your property and the size and shape of your roof.


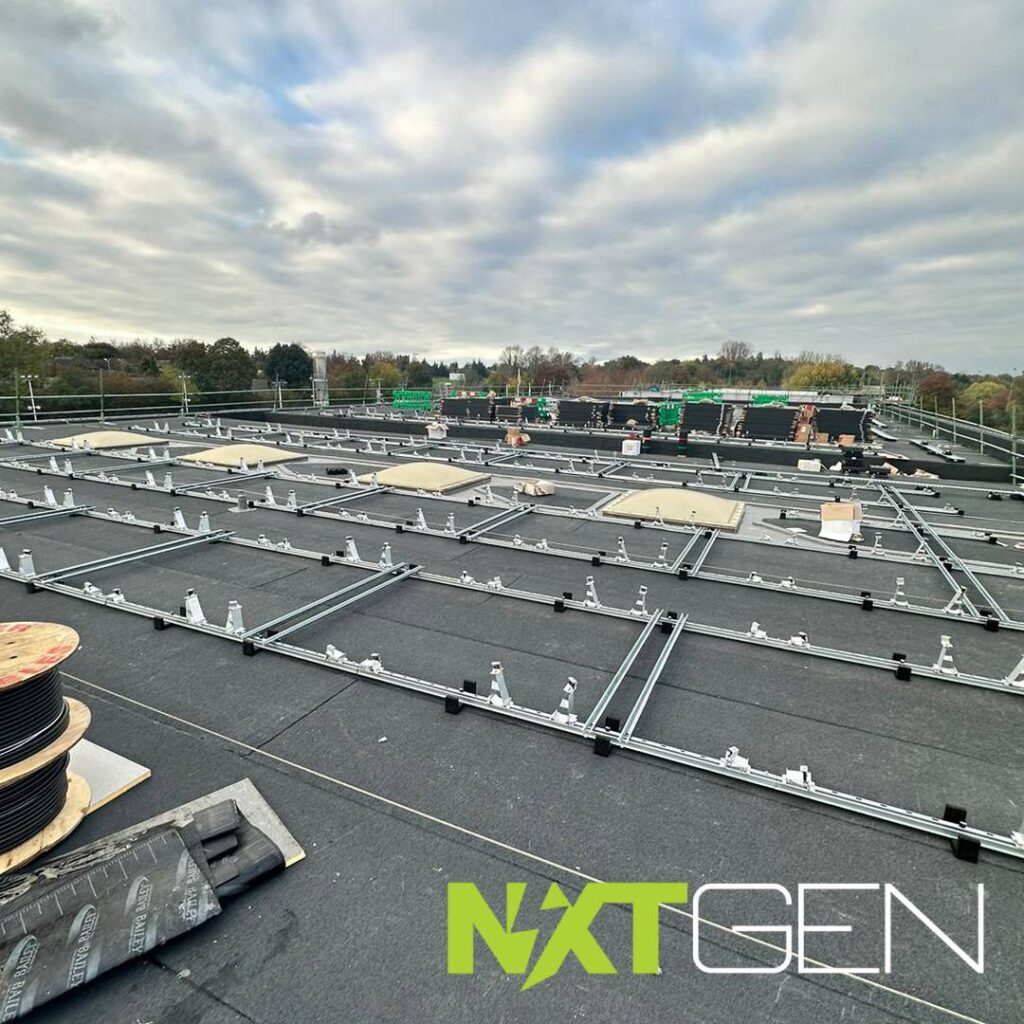
Step 2: Roof Anchors and Mounts
Next, your MCS Certified Installer will attach metal brackets called roof anchors to the rafters of your roof after removing a few of your roof tiles so he can get good access to your rafters. These roof anchors will support the aluminium frames that hold the solar panels in place. The installer will use a special tool to find the best location for each roof anchor, and then drill holes and secure them with very heavy duty bolts. After that, they will attach the aluminium frames to the roof anchors using metal rails called mounts that run both vertically and horizontally.
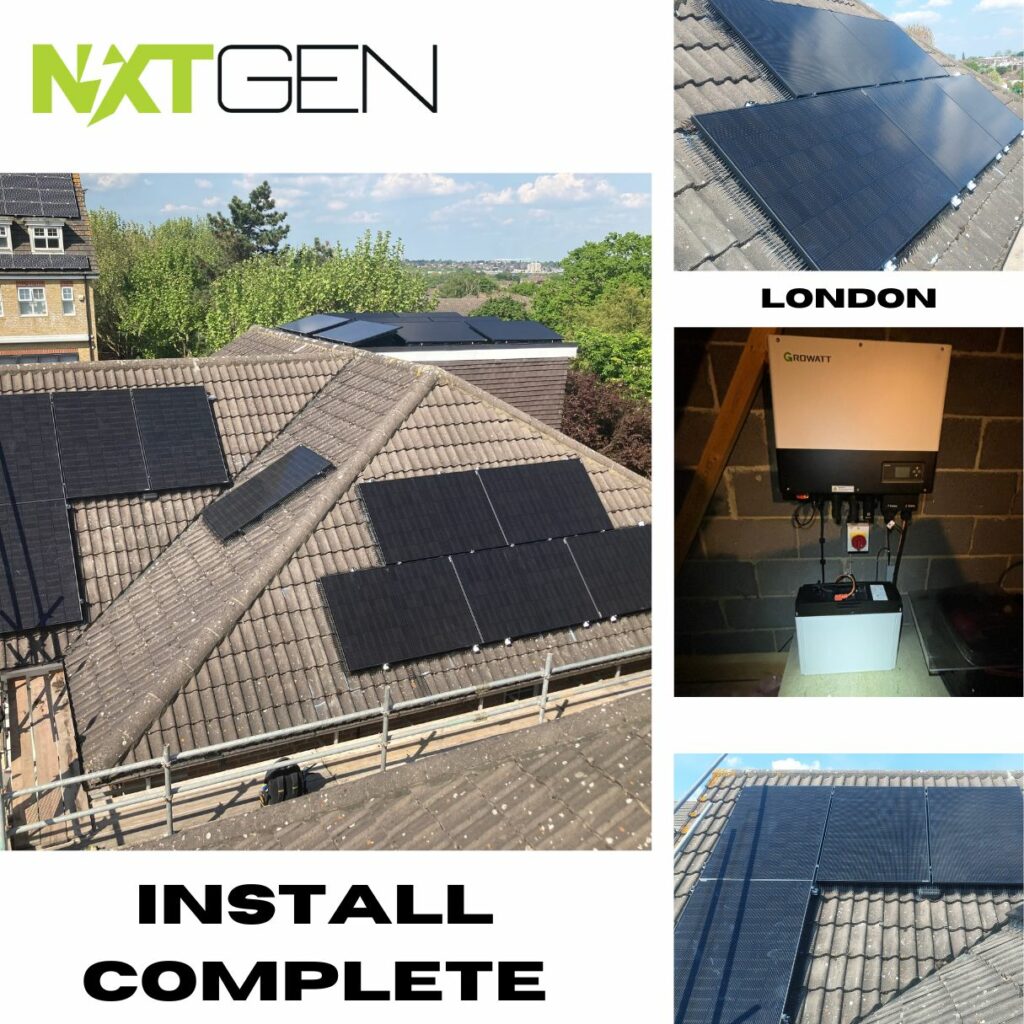

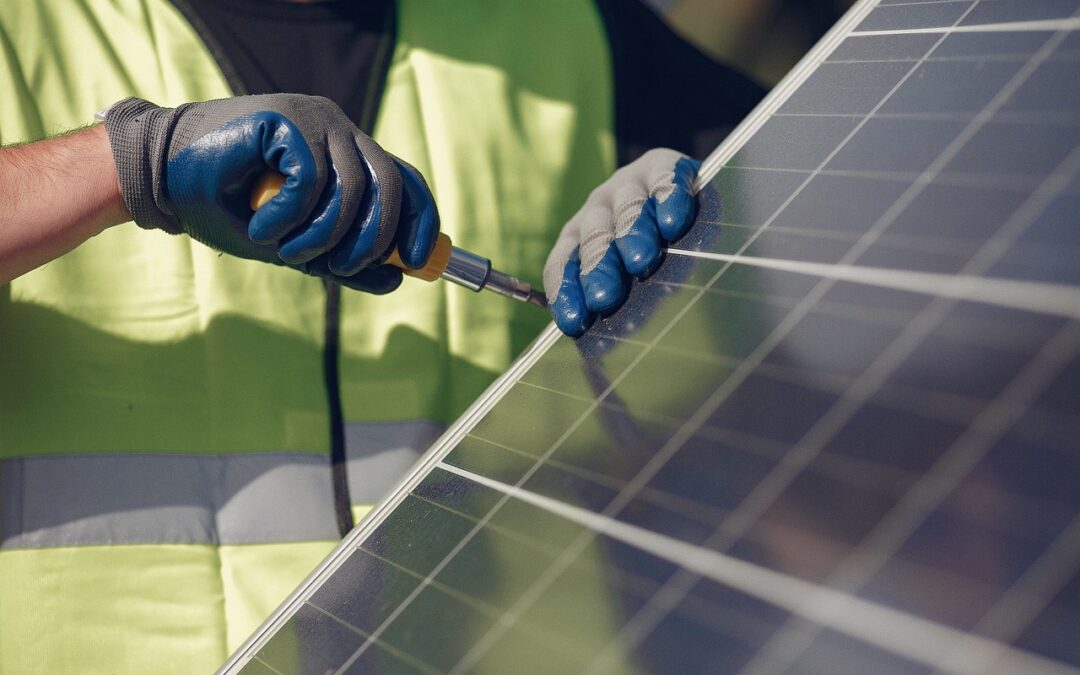
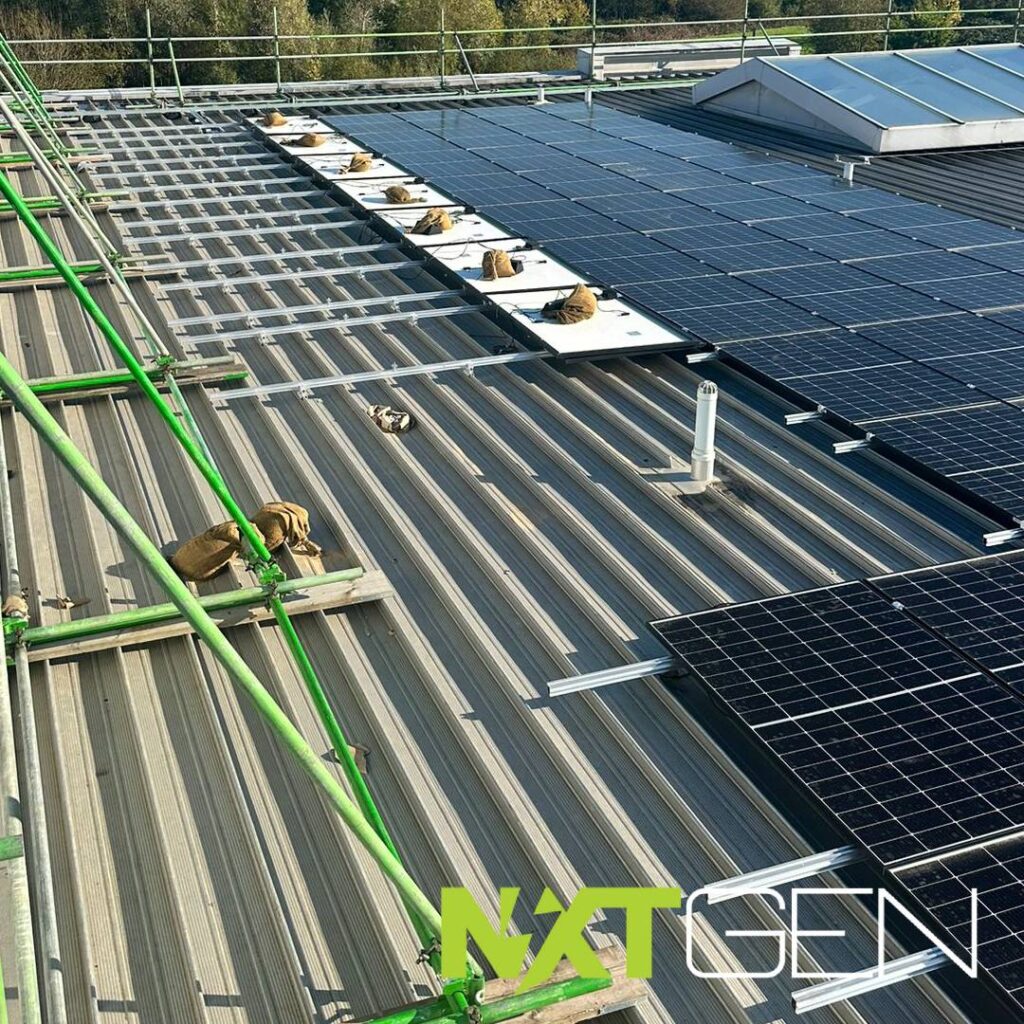
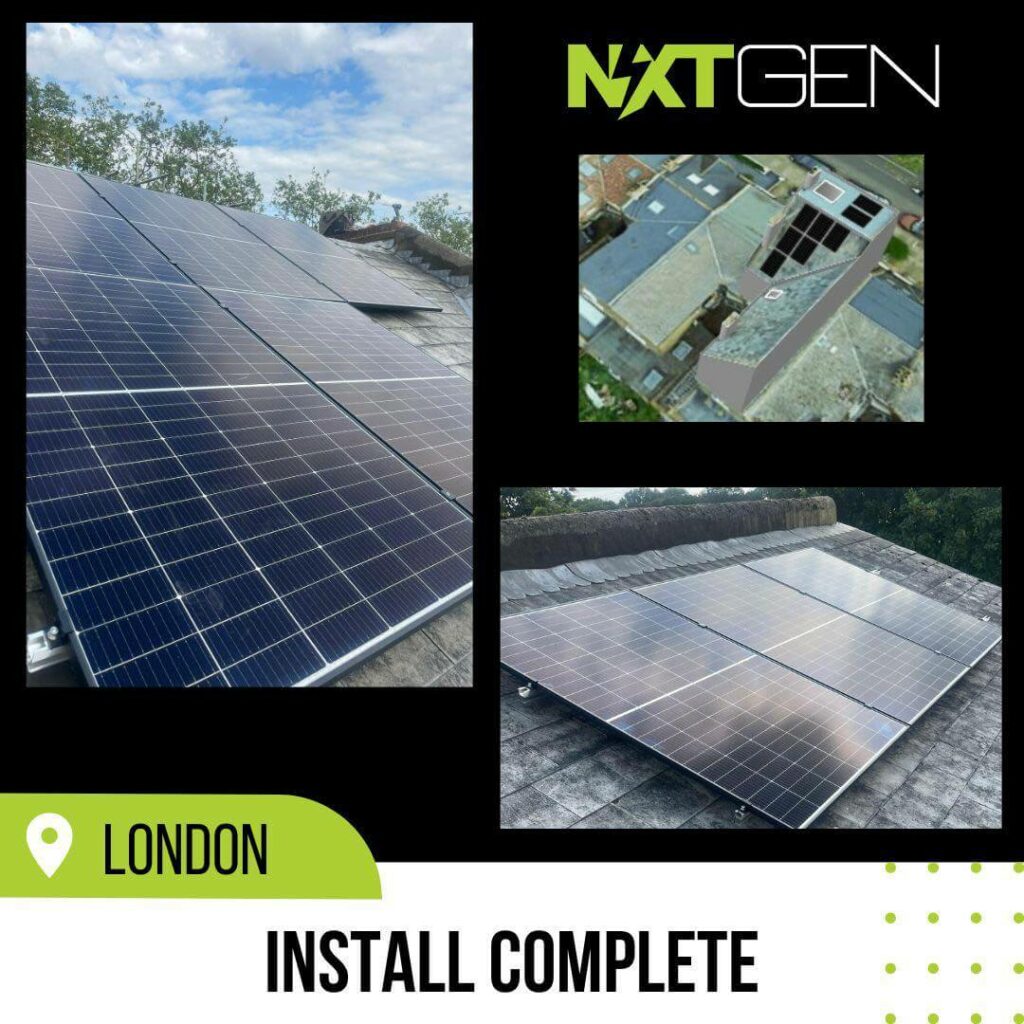
Step 3: Solar Panels
Once the frames are ready, your MCS Certified Installer will fix the solar panels on top of them using special solar panel clamps and screws. The installer will make sure that the solar panels are correctly aligned and spaced evenly, and that they face the optimal direction (normally as close to south-facing as possible) to capture the most sunlight throughout the daytime. Depending on the number and the size of your solar panels, this step may take several hours or even a couple of days.

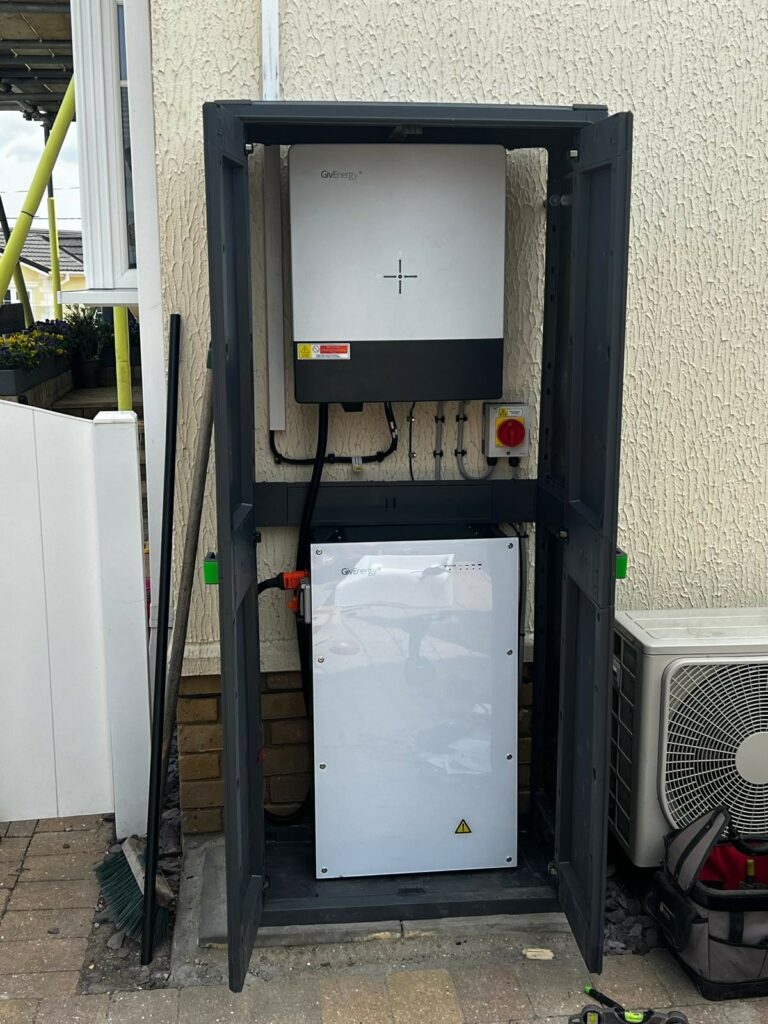
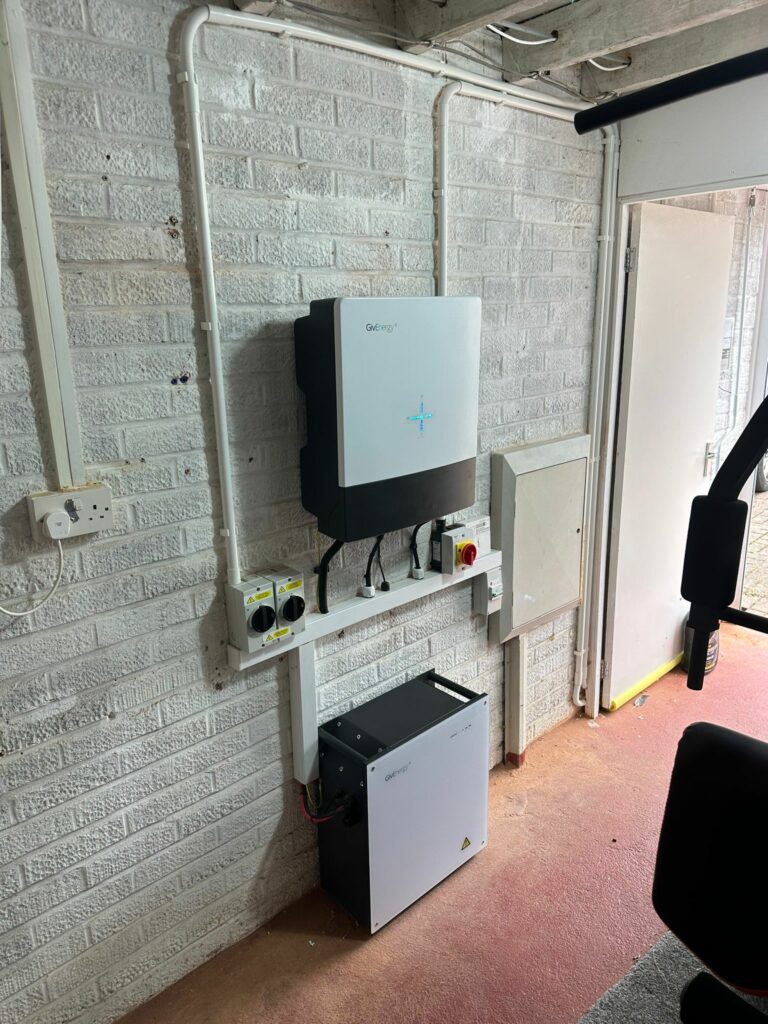
Step 4: Inverter
An inverter is a device that converts the direct current (DC) electricity produced by the solar panels into alternating current (AC) electricity that can be used by your home appliances and the National Grid. Your MCS Certified Installer will connect the inverter to your solar panels using cables, and then mount it either inside your house in a suitable location that isn’t you attic or loft space (IP20) or outside your house (IP65) in a special cabinet, depending on the type and model of the inverter. The inverter should be placed in a cool and dry location, away from direct sunlight, water and dust for best performance.

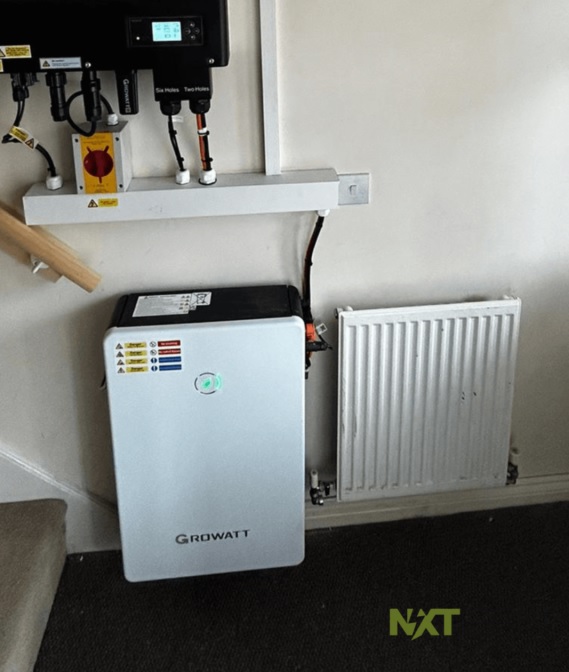
Step 5: Solar Battery
A solar battery is a component that you should add to your solar panels to save even more money in the long run and it also lowers the time it takes to recoup your initial investment in your solar panels. It can store the surplus solar energy that is not used immediately and can provide it to you when the sun is not shining on cloudy or rainy days or during the night or power cuts.
The solar batteries also need to be linked to an hybrid inverter, which converts the direct current (DC) from the solar panels and the battery into alternating current (AC) for your home appliances.

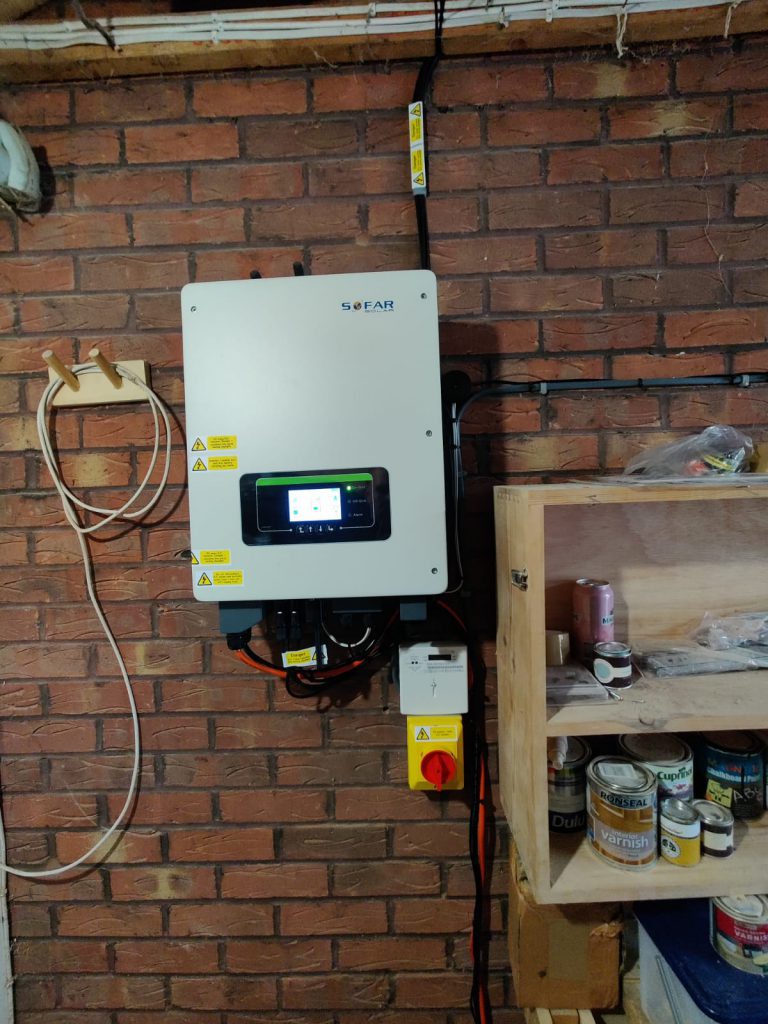
Step 6: Consumer Unit
A consumer unit, also known as a fuse board, is a box that distributes electricity to different circuits in your property. Your MCS Certified Installer will connect the inverter to your consumer unit using another cable, and then install a generation meter that measures how much electricity your solar panels produce. The consumer unit should be located near the main electricity supply of your property, and have enough space available for additional wiring and switches.


Step 7: Testing
The final step of the installation is to test the whole solar PV system and make sure everything works properly. Your MCS Certified installer will switch on the inverter and check if it displays the correct information, such as voltage, current, power, and frequency. They will also check if the generation meter is recording the electricity output of your solar panels, and if there are any errors or faults in the solar PV system. If everything is fine, your installer will explain to you how to use and maintain your solar PV system, and give you any relevant documents and certificates like your DNO Letter (G98 or G99) and your MCS Certificate that you need for the Smart Export Guarantee (SEG) scheme payments.


Step 8: Enjoy
Congratulations! You have successfully had solar panels professional installed on your roof. Now you can enjoy clean and renewable energy for years to come. You can also monitor your solar panel system’s performance online or through a smartphone app for your Apple iPhone or Google Android phone, and see how much money you are saving, and also how much carbon you are offsetting.
I hope this helps you understand how solar panels are installed. If you have any questions, please let me know in the comments below.
Are you ready to invest in Solar Panels & convert to clean, renewable energy?
If you are a UK homeowner and interested in learning more about how much money you could save with a Solar PV System, contact our expert solar energy team today. We specialise in Solar Panel Installations in Essex, but we also do installations across the south-east of the UK. By filling out our contact form, our team will provide you with a free no-obligation quote to install a bespoke solar PV system, catered to your personal energy needs. Call us on 01268 928 690 or click the button below to claim your free no-obligation quote and solar PV system design.